
There are a few ways to mount an Azure FileShare on your local machine.Here we will demo a quick and easy way:
On your local machine where you want to mount your file share.
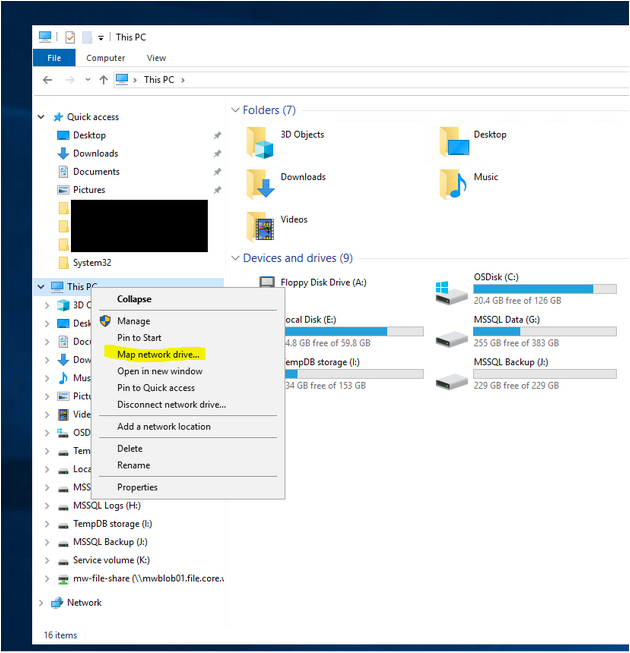
Right click ‘This PC’ and select ‘Map network drive…’
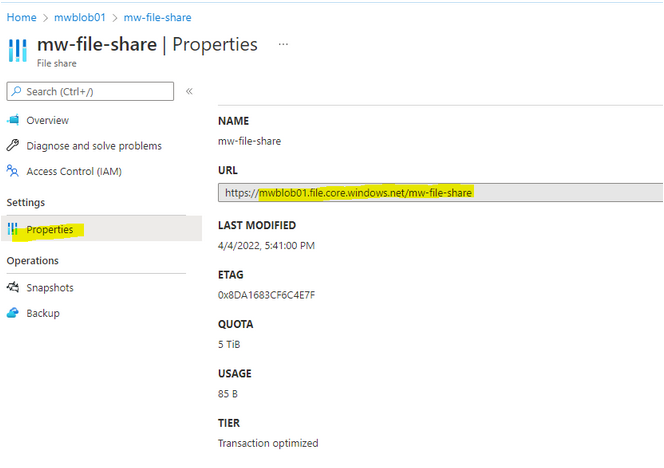
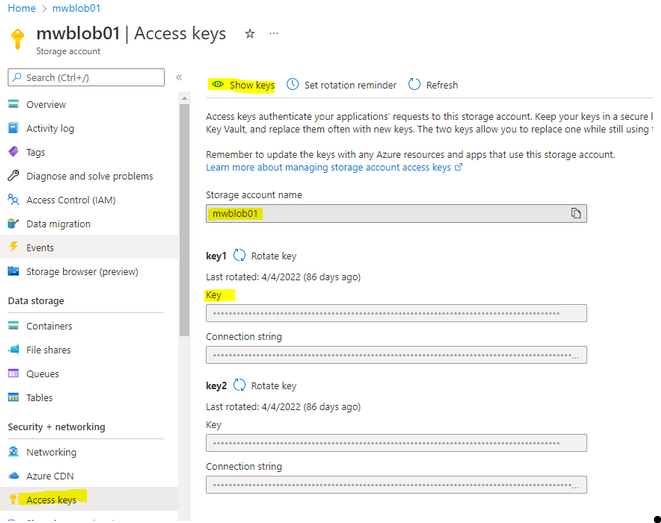
Next, in Azure get the URL to map the network drive.
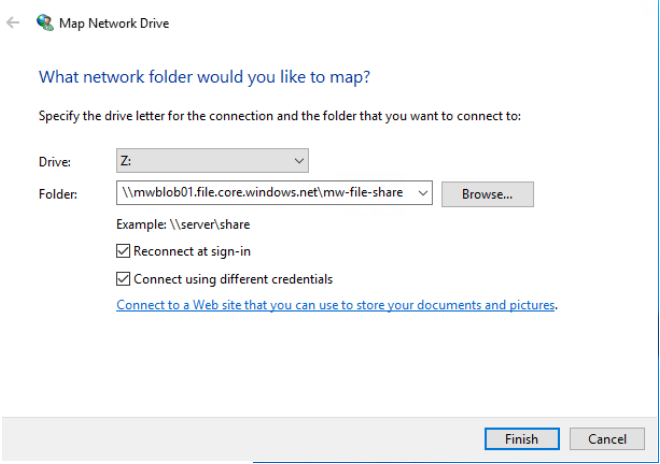
Add this URL to the folder path.
1. Set the Drive letter to your preferred drive.
2. Remove ‘https:’
3. Update the ‘/’ to ‘\’ for all instances in the path.
4. Check ‘Connect using different credentials’
Select ‘More choices’ > ‘Use a different account’
1. The user name is ‘Azure\<StorageAccountName>’
2. The password is the access key.
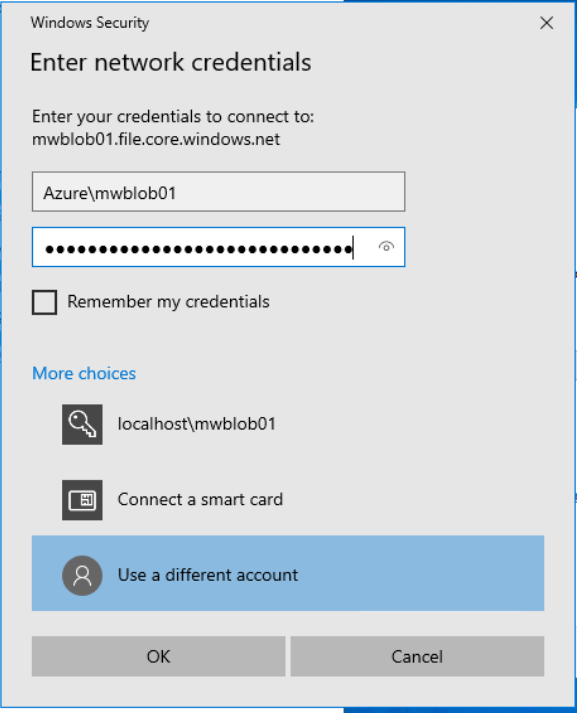
The log in information can be found under ‘Access keys’ for the storage account
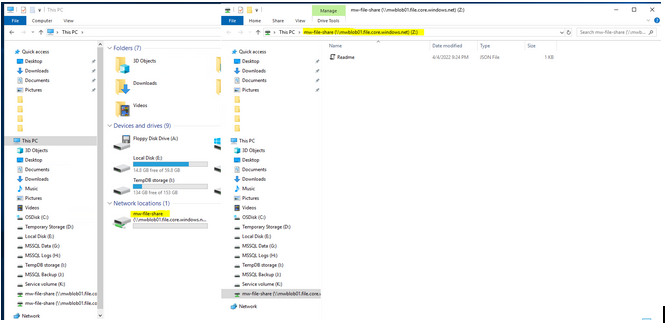
Connecting should automatically show the file share.
Keep reading about D365 tips and tricks here: https://markedcode.com/index.php/category/d365/


